- Login to your Jira with a user which has Jira admin rights.
- Go to: Jira Settings -> Products -> Application Links
- Create a new application-link by entering 'https://piplanning.io' in the field on the top of the page. Click "Create new Link".
- In the newly opened popup, press "Continue"
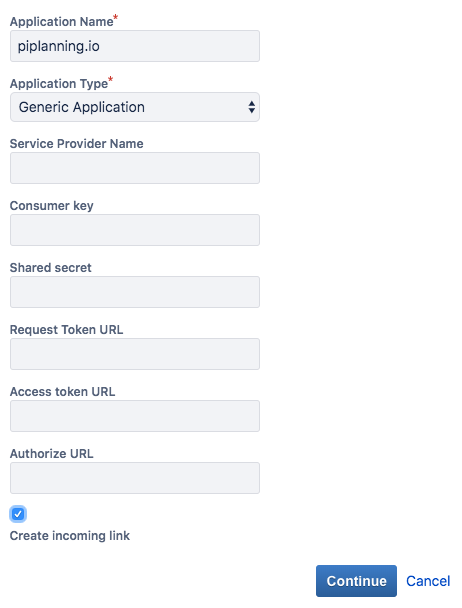
- Enter the application name 'piplanning.io' in the top field. Make sure you hit the checkbox 'Create incoming link' before clicking Continue.
- Enter the Consumer Key (needs to be exact) and Consumer Name 'piplanning.io'.
- Copy the Public-Key from the piplanning setuptool (Setup oAuth screen). Click Continue.
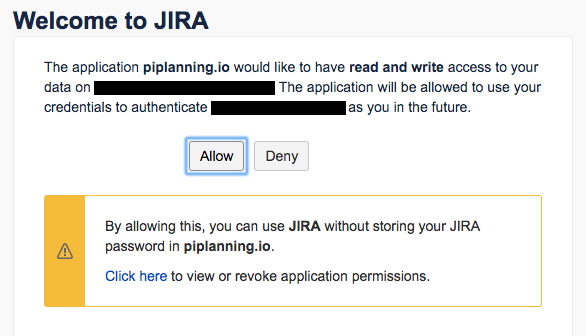
- On the piplanning setup tool page, click "Authenticate".
- Follow the steps displayed in the Jira page.
- Close the JIRA window and click "Check & Close" on the piplanning.io setup page.
Troubleshoot
If you see an error when you click "Authenticate": Open the js-console of your browser and check for additional errors.
If you see an error like: "oauth_problem=signature_invalid":
- Make sure that you your Jira is properly configured in terms of its "base url". If you use a proxy to let the piplanning app access your Jira, oAuth will most likely not work. The base url configured in Jira (system settings) and in the <JIRA-INSTALL>/
conf/server.xmlfile must exactly match the url you have entered to connect to Jira in the cockpit. - For more information, checkout the Atlassian help page: https://confluence.atlassian.com/kb/oauth-error-oauth_problem-signature_invalid-720406720.html


